Improve Campfire Cooking Skills
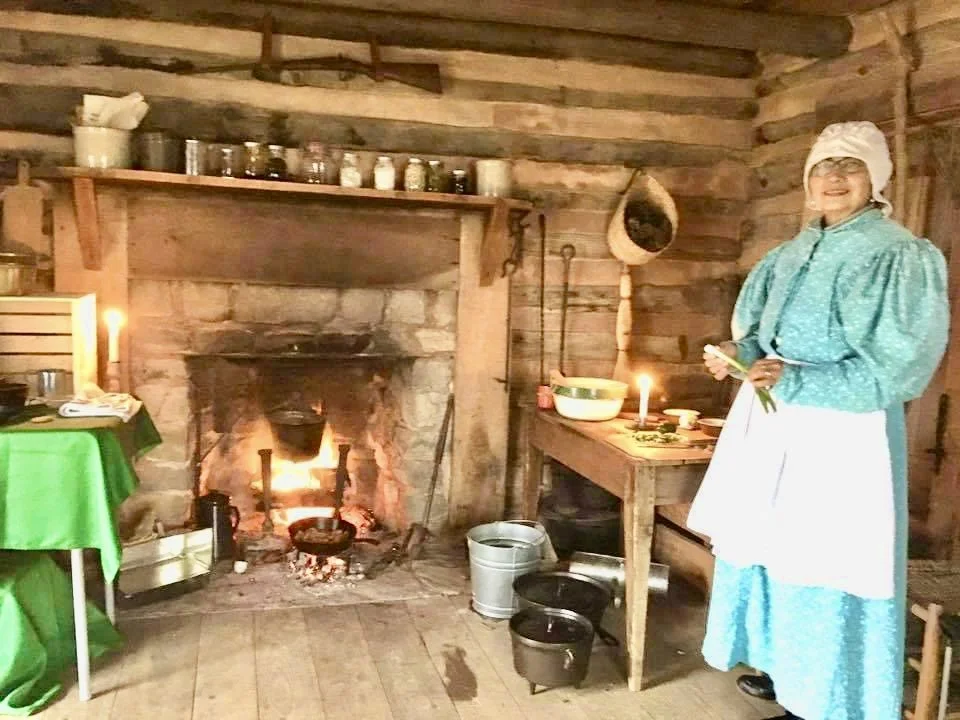
You can improve your campfire cooking skills by learning early American hearth and campfire cooking techniques. Before 1900, American pioneers and settlers cooked all of their meals over wood fires - and they taught their children how to do it at a very young age. Consequently, almost all women and many men knew how to cook a wide variety of delicious breads, meats, stews, casseroles, vegetables, and deserts over wood fires. On hot days, they cooked over campfires in their yards and on cool winter days, they cooked in the hearths of their cabin fireplace. When traveling along the Oregon Trail or some other immigrant trail, they found firewood every day and cooked their meals over a campfire each evening. Soldiers frequently pooled their rations and cooked them over a campfire in camp. And cowboys driving cattle herds from Texas up to a northern rail head, ate good tasting meals cooked over a campfire by their chuck wagon cook.
But after gas and electric stoves emerged in the early 1900s, most families stopped cooking over wood fires and stopped teaching their children how to do it. Consequently, very few Americans today know how to fry, stew, or bake foods on a campfire. But, if you want to enjoy all the pleasures of family tent camping, you must go back in time and learn how those early American pioneers cooked their foods. Indeed, being able to cook a variety of foods over a campfire will add immeasurably to the fun of family camping trips. So, this page will summarize important details about campfire cooking and basic procedures for cooking common foods.
Fuel
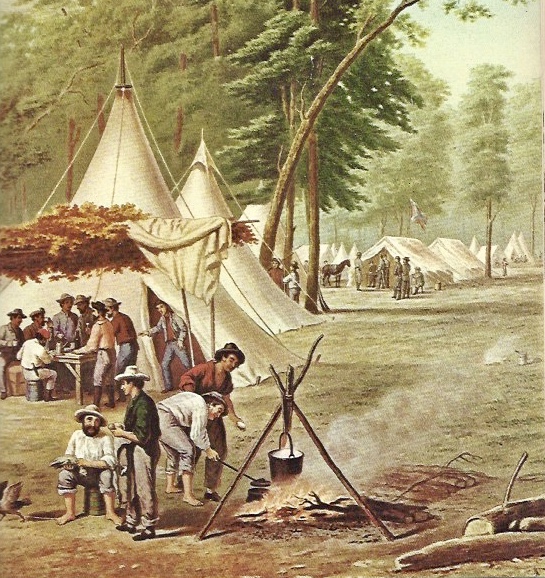
Campfire used by Civil War Soldiers to cook a meal.
Before cooking a meal, you must find good tinder, kindling, and firewood. Furthermore, you must have a good ignition source for starting a fire. In the past, pioneers used a small flint rock and a piece of carbon steel as their ignition source. Wooden friction matches (Lucifers) had been developed in 1829, but many pioneers continued to use flint and steel until 1900. For tinder, pioneers used dried grass, shredded tree bark, pine sapwood, charred cloth, or other natural materials. For kindling, they used dried tree branches that had fallen to the ground, or dried firewood split into very small pieces about 1 to 2 inches in diameter. As firewood, these pioneers used larger tree limbs (or trees) that had fallen to the ground and dried. If the piece was very large, they used saws and axes to cut it down to a more manageable size. Traditionally, they cut firewood to about 16 inches long and split it to about 6 to 8 inches in diameter.
Today, family tent campers could use the same materials - or - they could use a small butane lighter for their ignition source, a couple of pieces of dried newspaper for tinder, small pieces of pine split from scrap lumber as kindling, and bundles of firewood purchased from a store or firewood dealer.
The best wood for making a cooking fire should split easily, burn easily, produce high heat, and produce a minimum of smoke, soot, and sparks. Many different types of wood (trees) satisfy these criteria but some do not. So, you must become familiar with the best firewood types in your particular geographic location. Here in the southeastern states, we prefer oak and hickory but can use a variety of fruit and nut trees such as pecan, walnut, and cherry. In the central plains, mesquite seems to be the preferred firewood. And in the Great Lakes states, birch seems to be a popular fuel. Avoid elm, sweet gum, and sycamore because these woods are hard to split. Avoid willow and live oak because they are hard to burn. Avoid pine because it produces very little heat and creates a tar that sticks to your pots and grilled foods. And avoid wood with knots, crotches, and twisted grain because they will be hard to split.
Regardless of the wood you use, it should have less than 20% moisture content. The best way to determine moisture content is with a moisture meter. But if you don’t have a moisture meter, ask the seller about length of drying time and visually inspect the wood. The wood should have been drying at least one year and preferably two. The ends should be dark and have cracks in them; the bark should easily peal away from the wood; and the wood should feel relatively light weight.
If you are just learning how to cook or bake over a fire, you may want to begin with charcoal. Charcoal allows better control of the heat so you can just count the number of briquettes you use for the fire.
FINDING Good firewood
Sometimes you can find good firewood laying on the ground near your campsite but frequently you cannot. The fallen wood has already been gathered by previous campers - or the park forbids gathering firewood because it provides food and shelter for small organisms at the bottom of the food chain. And sometimes you can buy bundles of good firewood from a vendor in the park, but frequently you cannot. Many parks either do not sell firewood - or the firewood is too fibrous to split, too wet to burn, too sappy to cook food, too sparkly, too smoky, or otherwise poorly suited for campfire cooking. So modern family campers must learn how to find good firewood near their camping destination.
The best place to find good dried firewood is a firewood dealer. Search the internet and ask park employees for the best firewood dealers in the area. If you can’t find a firewood dealer, look for tree cutting services. If you still can’t find a good dealer, check local farm supply stores, home improvement stores, grocery stores, and convenience stores.
Splitting Firewood
The logs typically sold in firewood bundles are too large in diameter to start a fire so you may have to split them several times to make kindling and small logs. And so, campers must learn how to safely and efficiently split large pieces of firewood down to a more useful size. A few pieces may have to be split down until they about the diameter of a pencil - be used as kindling for starting the fire. A few more pieces may have to be split down to the size of your thumb - to be used to build the fire to get it hot enough for larger pieces of wood. And the rest of the pieces should be split until they are about the size of a large man’s wrist - small enough to burn fast and quickly make hot coals for frying and baking.
To split this wood, campers will need a good camp axe and a splitting platform. The best firewood splitting axe, in my opinion, is a small boys axe with a 2-pound Dayton-style head hung on a 24 inch handle - but this size is too large for my camp tool bag. So, I usually pack a smaller Estwing Camper’s Axe 14 in our tool bag. With a couple of wedges, it splits firewood reasonably easy. You will also need a tree stump, a tree round, or something else that can be used as a splitting platform. For safety and efficiency, I use an “upside down” method to split larger pieces and a “slide splitting” method to split small pieces. These two methods are demonstrated at the end of the CAMP AXES page of this website.
Water
Before starting a fire, you’ll need about 2 gallons of water for washing hands, washing foods, cooking, washing dishes, and possibly, extinguishing a fire that gets out of control. In the past, children were usually sent down to the river or spring to fetch this water early each morning but today most campgrounds make potable water available in or near each campsite. When you use the water to wash foods or dishes, catch the grey water in a bucket so it is still available for extinguishing a fire if necessary. After cooking, you can use the grey water to extinguish the fire or you can dispose of it in the campground disposal station.
Cookware
You will need to assemble a good set of cookware that is well suited for campfire cooking. In particular, you will need a cast iron skillet, a cast iron Dutch oven, and two or three pots made of stainless steel or enameled steel - rather than glass, aluminum, or titanium. Cooking utensils should be made of wood, bamboo, or steel rather than Nylon. All of these items plus your dinnerware and flatware should nest together so that it can be packed into a relatively small space. For more information about camp cookware, please visit the CAST IRON COOKWARE and CAMP KITCHEN pages of this website.
Other Equipment
In addition to your skillet and pots, you will need several other pieces of equipment for cooking over a campfire. A few campfire cooks like to hang pots from a lug pole with S hooks and ratchets, but most campfire cooks do not use a lug pole setup. Instead, they cook foods over varying amounts of hot coals. Equipment needed for this setup includes: a pair of heavy leather gloves to protect your hands from the heat, a small shovel or pair of large tongs to move hot coals from the fire to your cooking area, two trivets or a gridiron for setting pots and pans above a bed of hot coals, a pair of channel lock pliers or some other lid lifting tool, and a cake pan that is slightly smaller than the diameter of your Dutch oven to be used as a baking dish.
Campfire Location
After splitting the firewood, campers must decide where to build their campfire. The ideal place to cook with a wood fire is a pedestal grill, but many campgrounds do not offer them. If a pedestal grill is not available, a fire ring with an adjustable height cooking grate would be almost as good. But again many campgrounds do not offer fire rings with adjustable height cooking grates. And so, the last option is a fire ring with no cooking grate. In this later case, campers will need some additional equipment to enable them to cook a variety of great tasting foods. Some items that will help are a couple of trivets, a folding cooking grate, a tripod, and/or a lug pole with two upright support poles.

Pedestal grills are well suited for wood fire cooking.
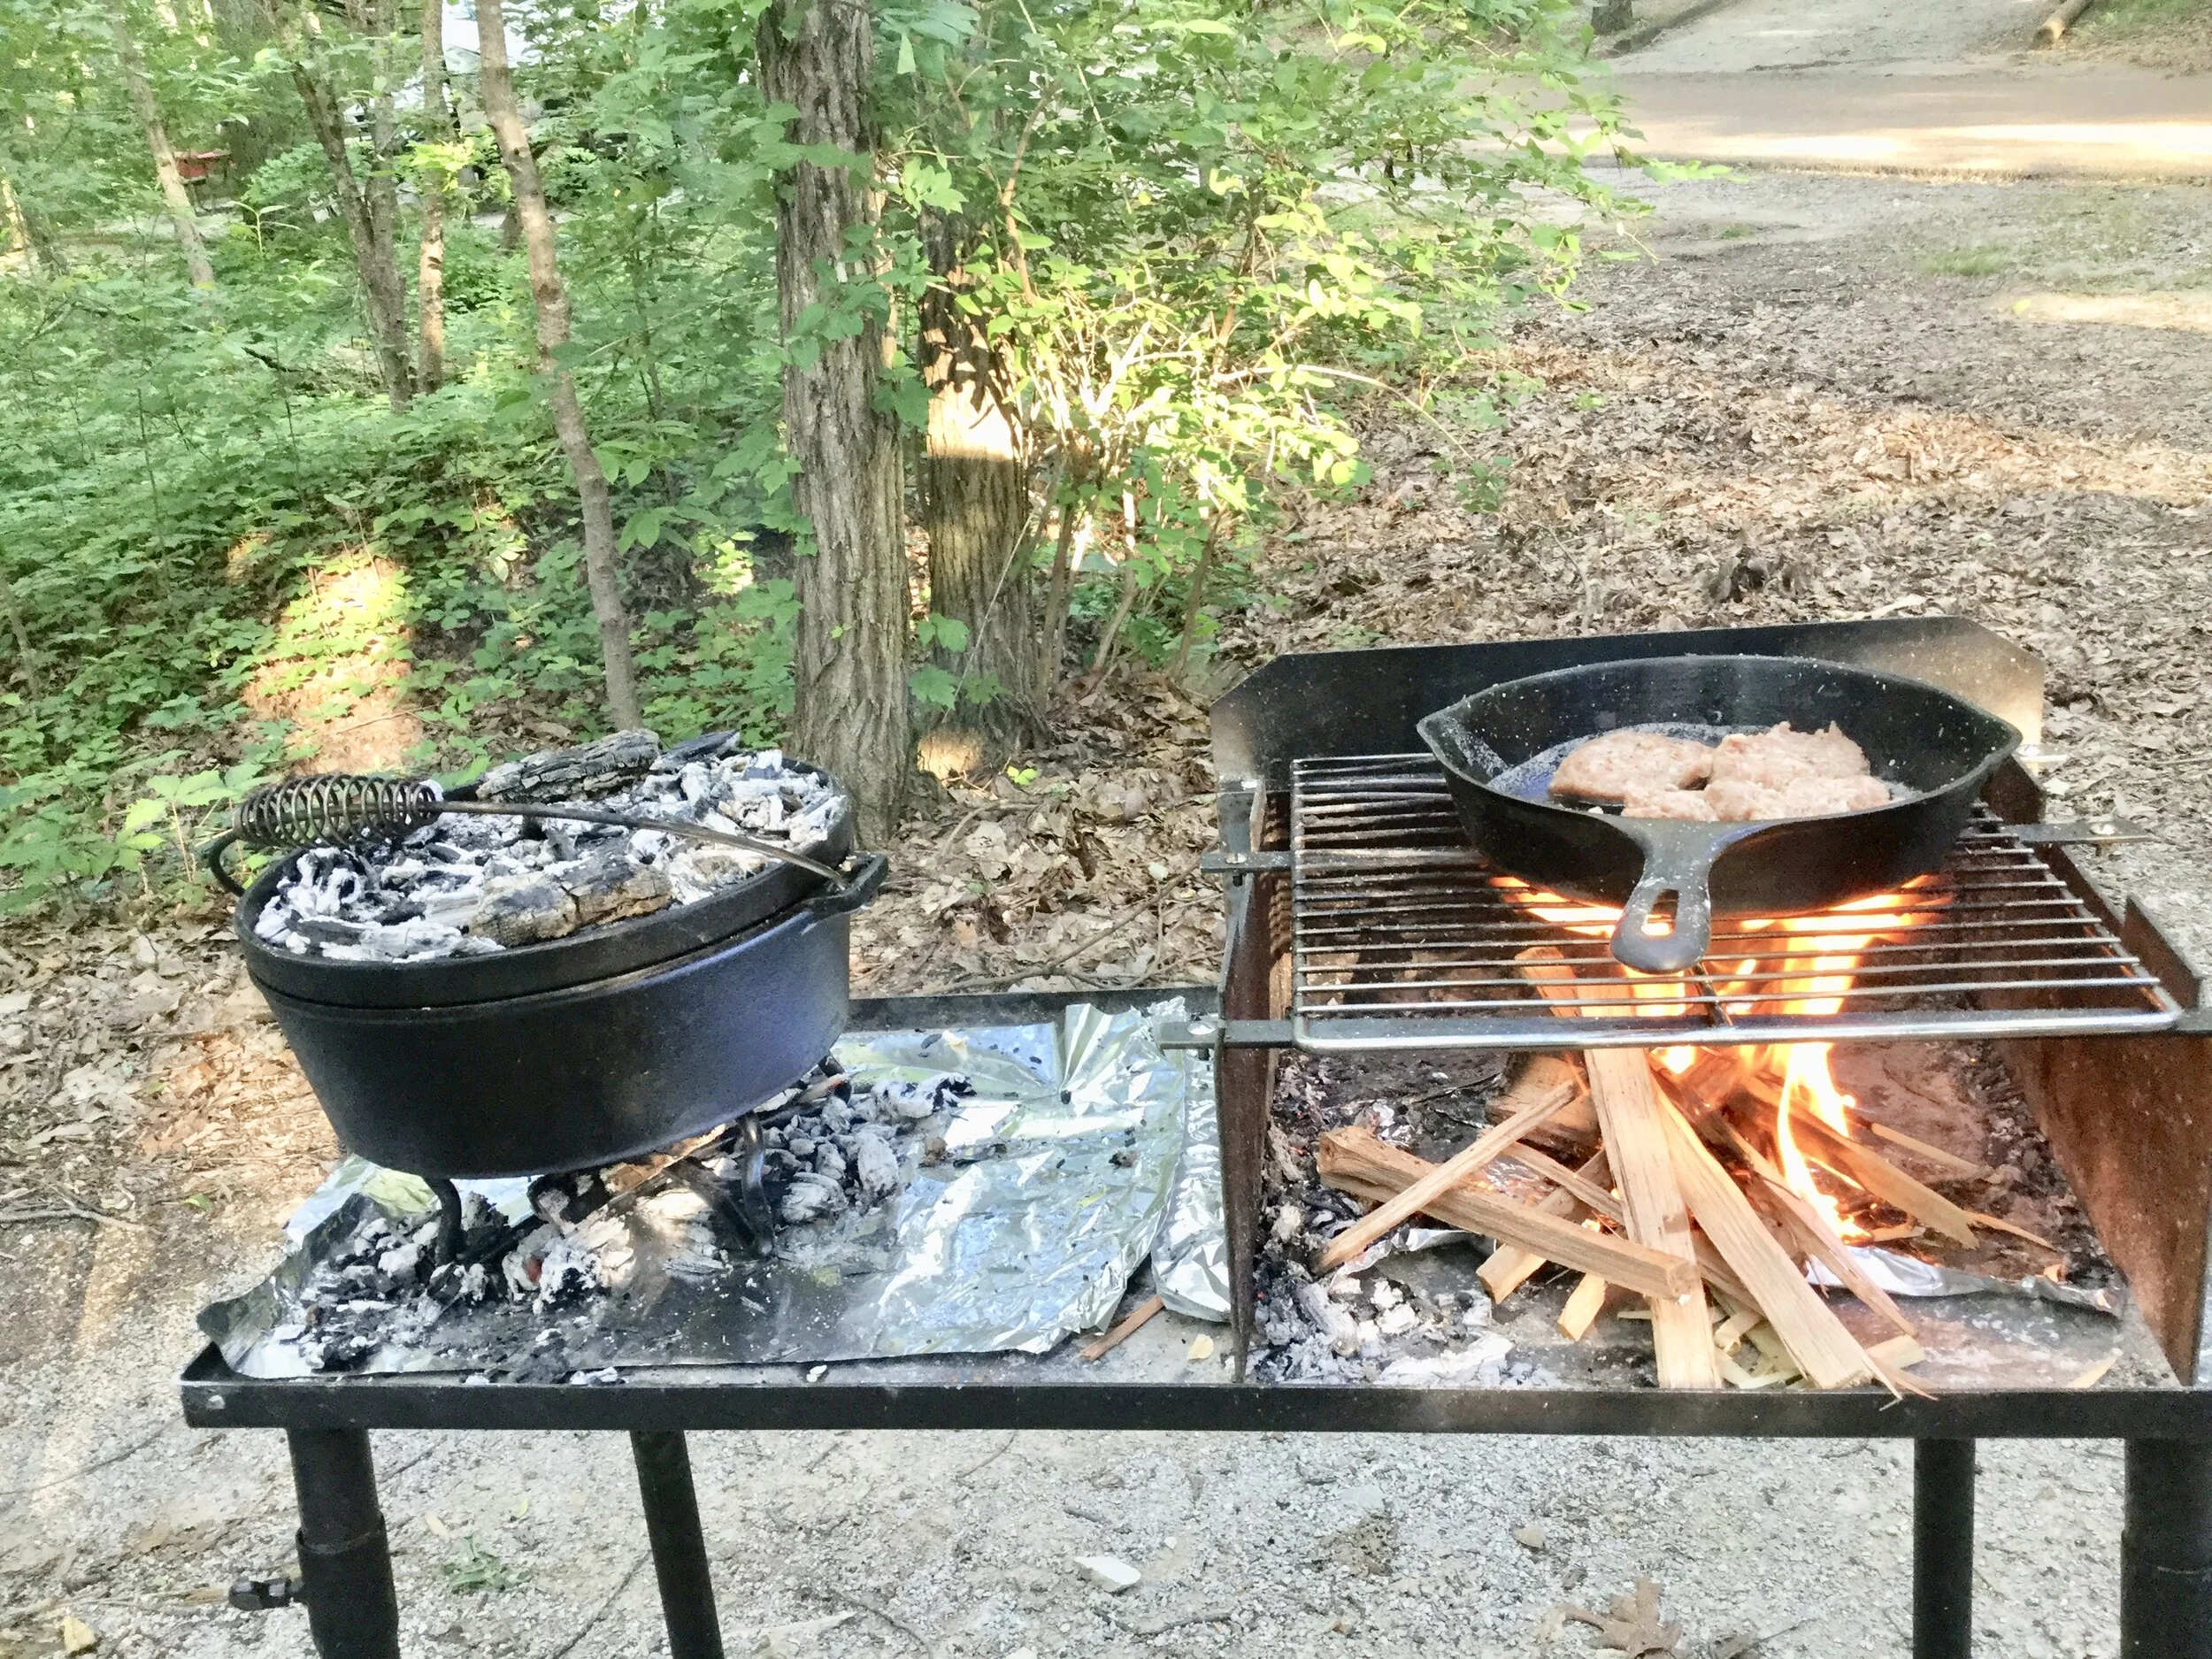
A cast iron skillet and Dutch Oven are great for wood fire cooking.

Use a 3-inch trivet to boil, fry, or simmer foods above hot coals.
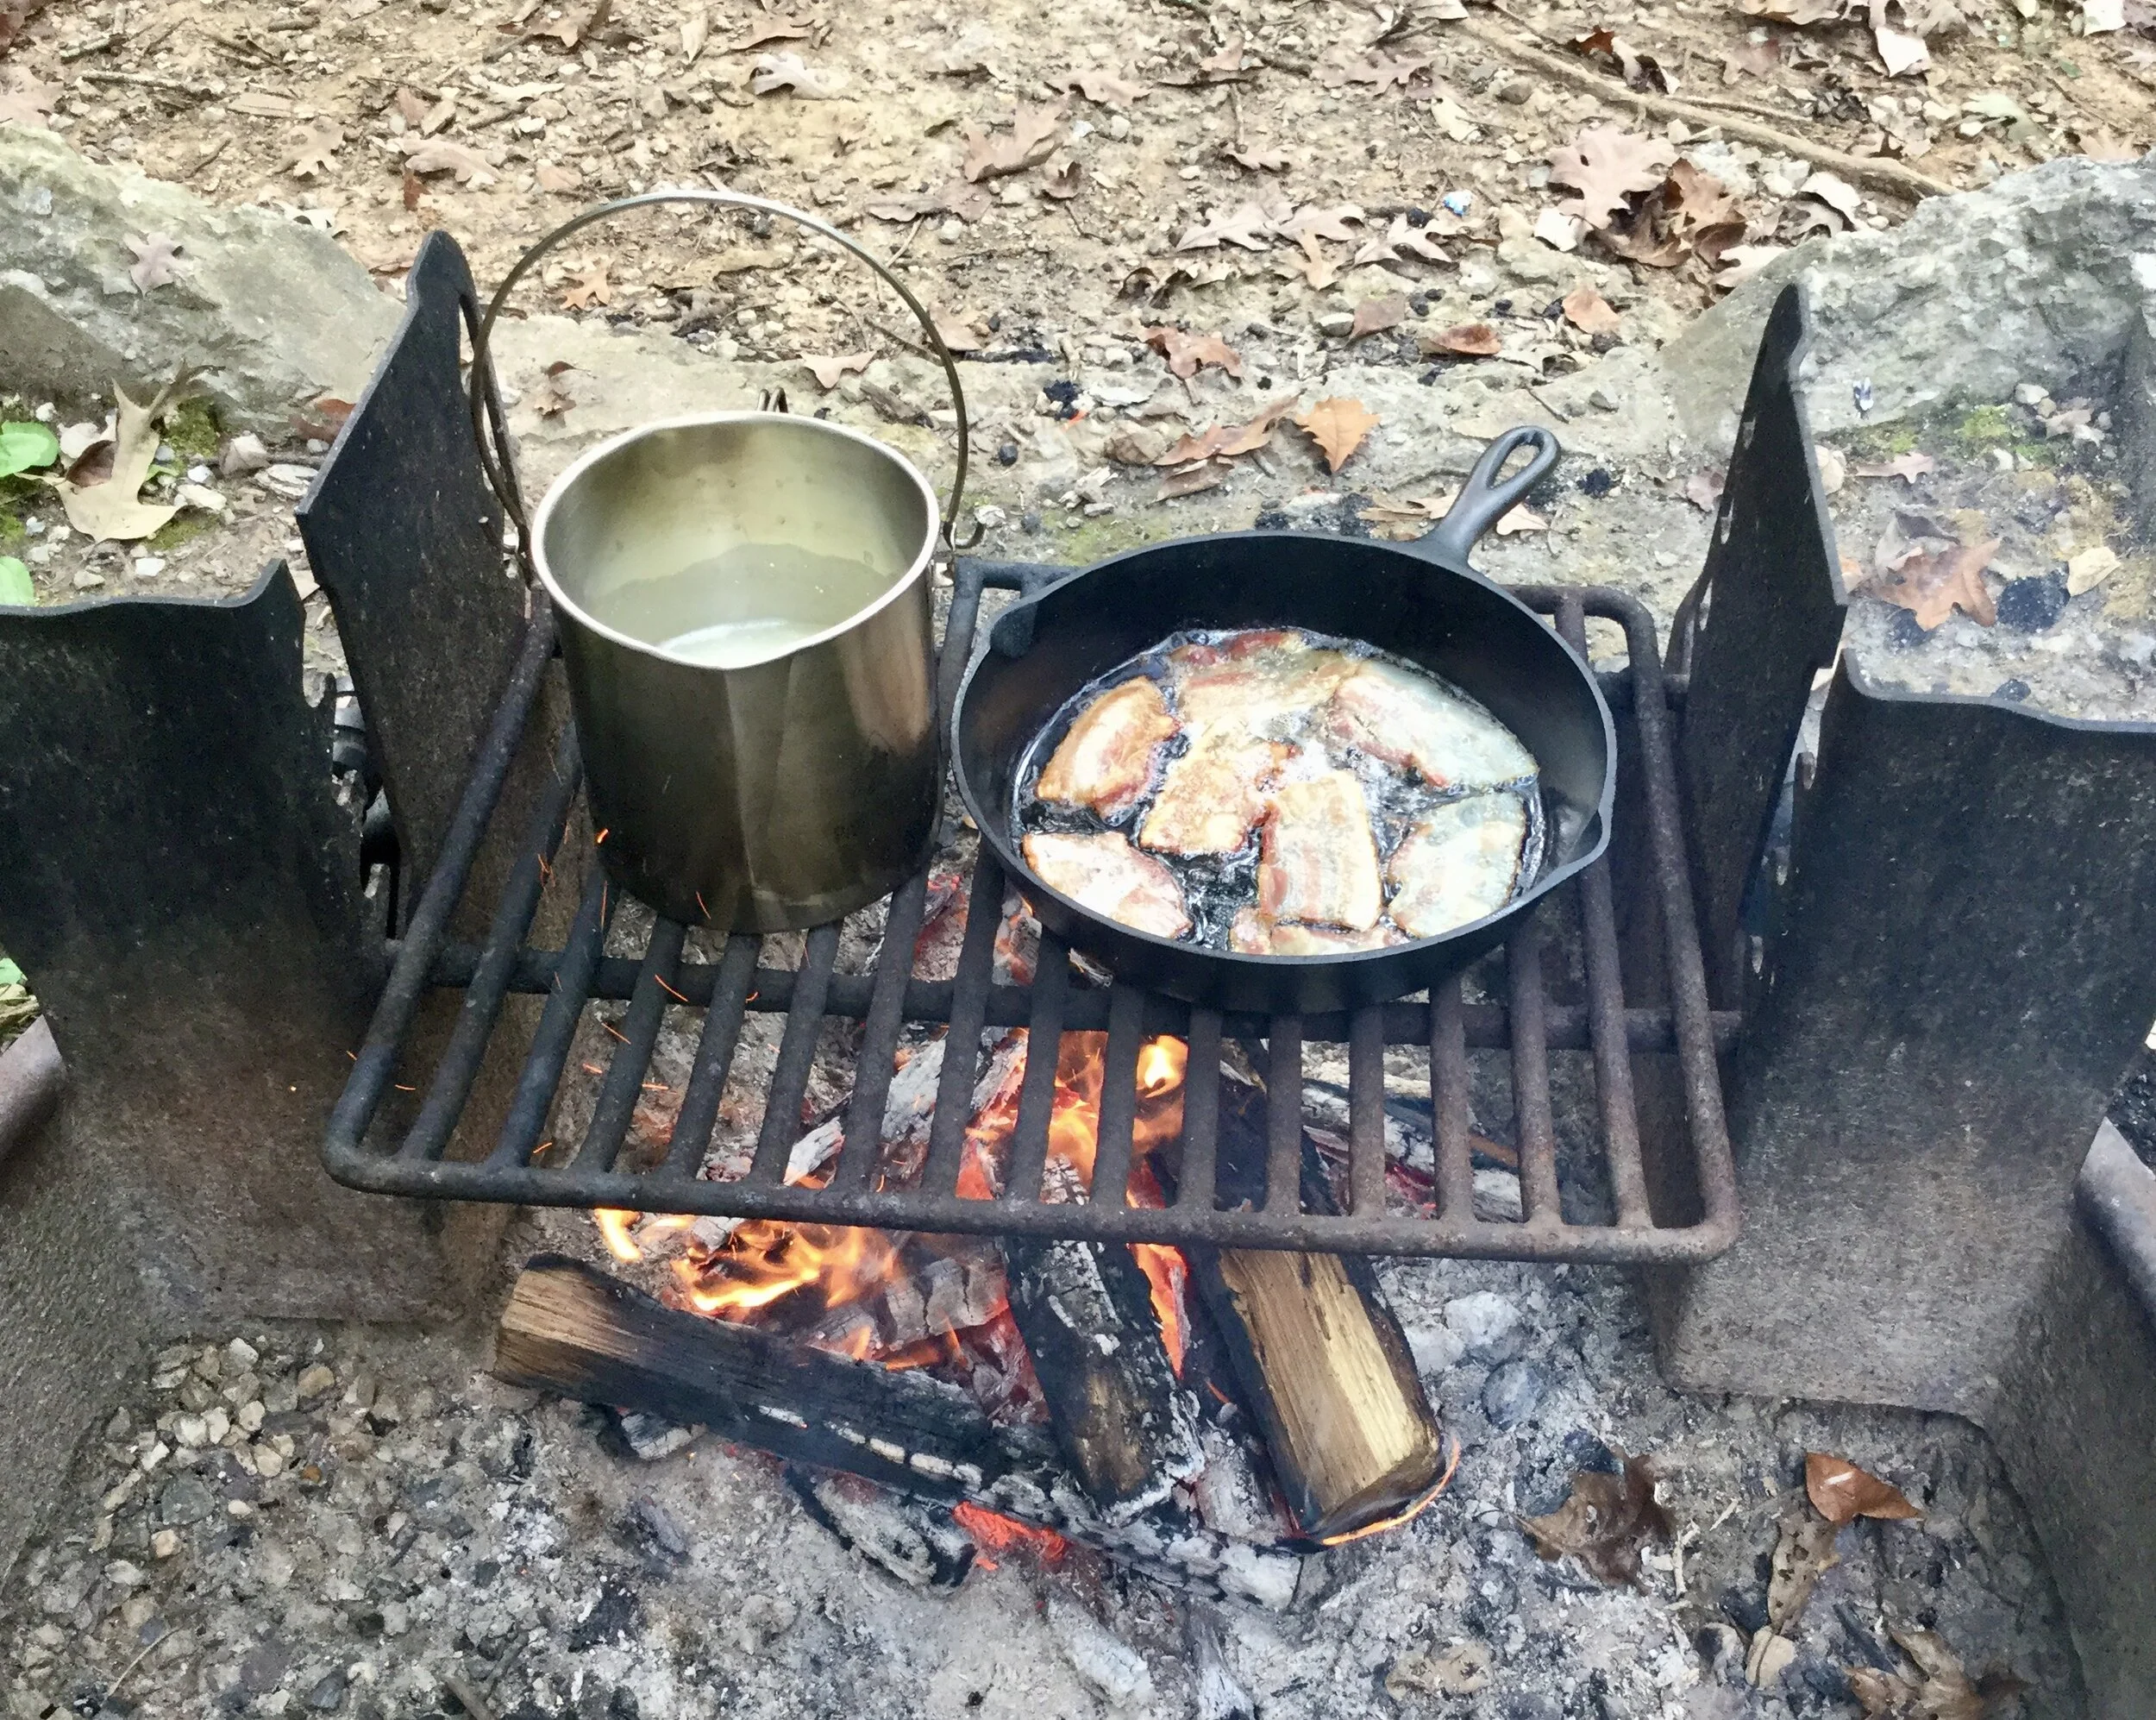
Fry bacon and boil grits over a low fire.
General Procedures
Start a cooking fire at least one hour before starting cooking. When possible, start it on andirons (or log dogs) - so that hot coals will drop down to the ground between the andirons where it will be easy to shovel them. Sometimes the fire can be started from the embers of the previous day’s fire but frequently, it wi.ll have to be started with a butane lighter.
After large logs burn for an hour or so, hot coals will form and these coals, in varying amounts, can be used for simmering, frying, and baking different foods. After these hot coals have been removed, the fire must be built back quickly with more logs so that more coals will be available when needed.
Boiling water for pasta, grits, & other dried foods
Best to boil over medium flames. Allow flames to settle down to about one inch above the cooking grate and then place the pot of water on the grate. When the water boils, add the dried foods and move the pot to a cooler location on the cooking grate or lower the flames by spreading the fuel out along the sides of the fire pit. Allow to simmer for the required time.
Boiling beans, Cabbage & Other Vegetables
Best to cook over medium flame. Cook beans, cabage, and other vegetables in a cast iron Dutch oven or large steel pot. In a pot or Dutch oven, add a little fat such as rendered bacon or oil and then sauté onions & peppers. Then, add 2-3 cups hot water & either bullion or broth. Then, add vegetables potatoes, corn, beans, or greens and simmer 1 to 2 hours until done.
Simmering soups & Stews
Can cook over hot coals or low flames. First, fry, braise, boil, grill, or sear meat (bacon, beef, chicken, pork, rabbit, squirrel, venison or fish) until it is brown. Then sautee onions, garlic, and peppers in oil. Combine vegetables (carrots, onions, potatoes, peppers, corn, celery & lima beans) with water, seasonings (salt, pepper, crushed red pepper, garlic, cumin, bay leaves & cilantro), salt pork, bacon, chicken broth, and/or some other meat in cast iron pots set above hot coals on trivets or on low flames. Add carrots early because they require longer cooking time. Adjust cooking temperature by moving food to a cooler spot on the cooking grate, or by adding or removing hot coals. Simmer for 1 to 2 hours. Thicken with corn starch, rice, and/ or flour.
Grilling steak, pork chops & vegetables wraped in aluminum foil
Best to cook over low flames. Allow flames to settle down to about the same height as the cooking grate. Increase the heat by adding small pieces of stovewood or large kindling. Lower the heat by moving the meat to a cooler spot on the cooking grate or by moving some fuel to the sides of the fire pit. Cook slowly until center of meat reaches a safe temperature. We cook our meats until the juices are clear.
Frying Bacon, Eggs & Other Foods
In the past, fried foods such as bacon, eggs, and hoe cakes were fried in a cast iron spider - a skillet with legs. But today, camping families would use a cast iron skillet (a spider without legs) set on a tall trivet or gridiron. To fry food, you can cook over an open flame or over hot coals. When cooking over hot coals, shovel coals from the fire and spread under the trivet, or grid iron. Adjust temperature by adding or removing coals as needed. Before placing food in the skillet, oil it with two teaspoons of bacon grease, oil, butter, or Crisco. Cook most foods slow with low to medium heat; Avoid high heat because it will burn your food, damage your seasoning layers, cause flash rust, and cause your pan or pot to warp or crack.

Bake lasagna in a Dutch oven.

Bake fruit pies in a Dutch oven.

Biscuits are easy to make in a Dutch oven.

Bread requires a lot of work but tastes great when baked in a Dutch oven with a wood fire.
Baking Biscuits, Corn Bread & Other Foods
You can bake biscuits, bread, cornbread, pies, and cobblers in a cast iron camping Dutch oven (formally called bake kettles). Most of these camping Dutch ovens have three legs but an oven without legs is much more versatile. More importantly, these ovens should have flat lid with a lip or flange around the outside edge.
Best to bake over hot coals. Before baking, place metallic pan or foil on ground under the oven to reflect heat up to the oven and to protect the ground from excessive heat. Use a 3-inch trivet to raise the oven above the coals. To bake, shovel just a few hot coals under the oven and place many more coals on top. The best number of coals on top depends upon ideal baking temperature. For example, if the ideal baking temperature is about 350 degrees, shovel enough coals to cover most of the lid but allow small spaces between the coals; if the ideal temperature is about 400 degrees, make a hot oven by completely covering the lid with coals. To adjust temperature, add or remove coals as needed. To assure even baking, rotate the oven and the lid every 15 minutes. When baking some foods such as pies and lagsana, you may want to bake the food in a cake or pie pan to reduce sticking. When baking in a pan, you can reduce risk of burning the bottom by setting the pan on a low trivet or several small stones placed on the bottom of the Dutch oven.