Buy a Camp Kitchen Shelter
Buy a covered kitchen shelter that can protect your family from rain, wind, direct sun light, bugs, and cold weather. This kitchen shelter could be a tarp, sun shade, or screen tent. It will add considerable comfort on your camping trips - especially on multi-day base camp trips. It will provide a protected place for preparing meals, eating meals, washing dishes, repairing gear, playing board games, and just relaxing. For maximum efficiency, arrange a small table or two around the edges of the shelter - where the roof is lower - for preparing and cooking meals and reserve the center of the shelter for standing while cooking and performing other camp chores.
Best Kitchen Shelters for 2023
Here is my list of the best kitchen shelters for the current year with a few important features, the price posted during the first few weeks of the year, and price for windproof side walls. Prices will fluctuate during the year so you can often find these shelters offered for much less than the price cited below. Most of these shelters are linked to Amazon for more information.
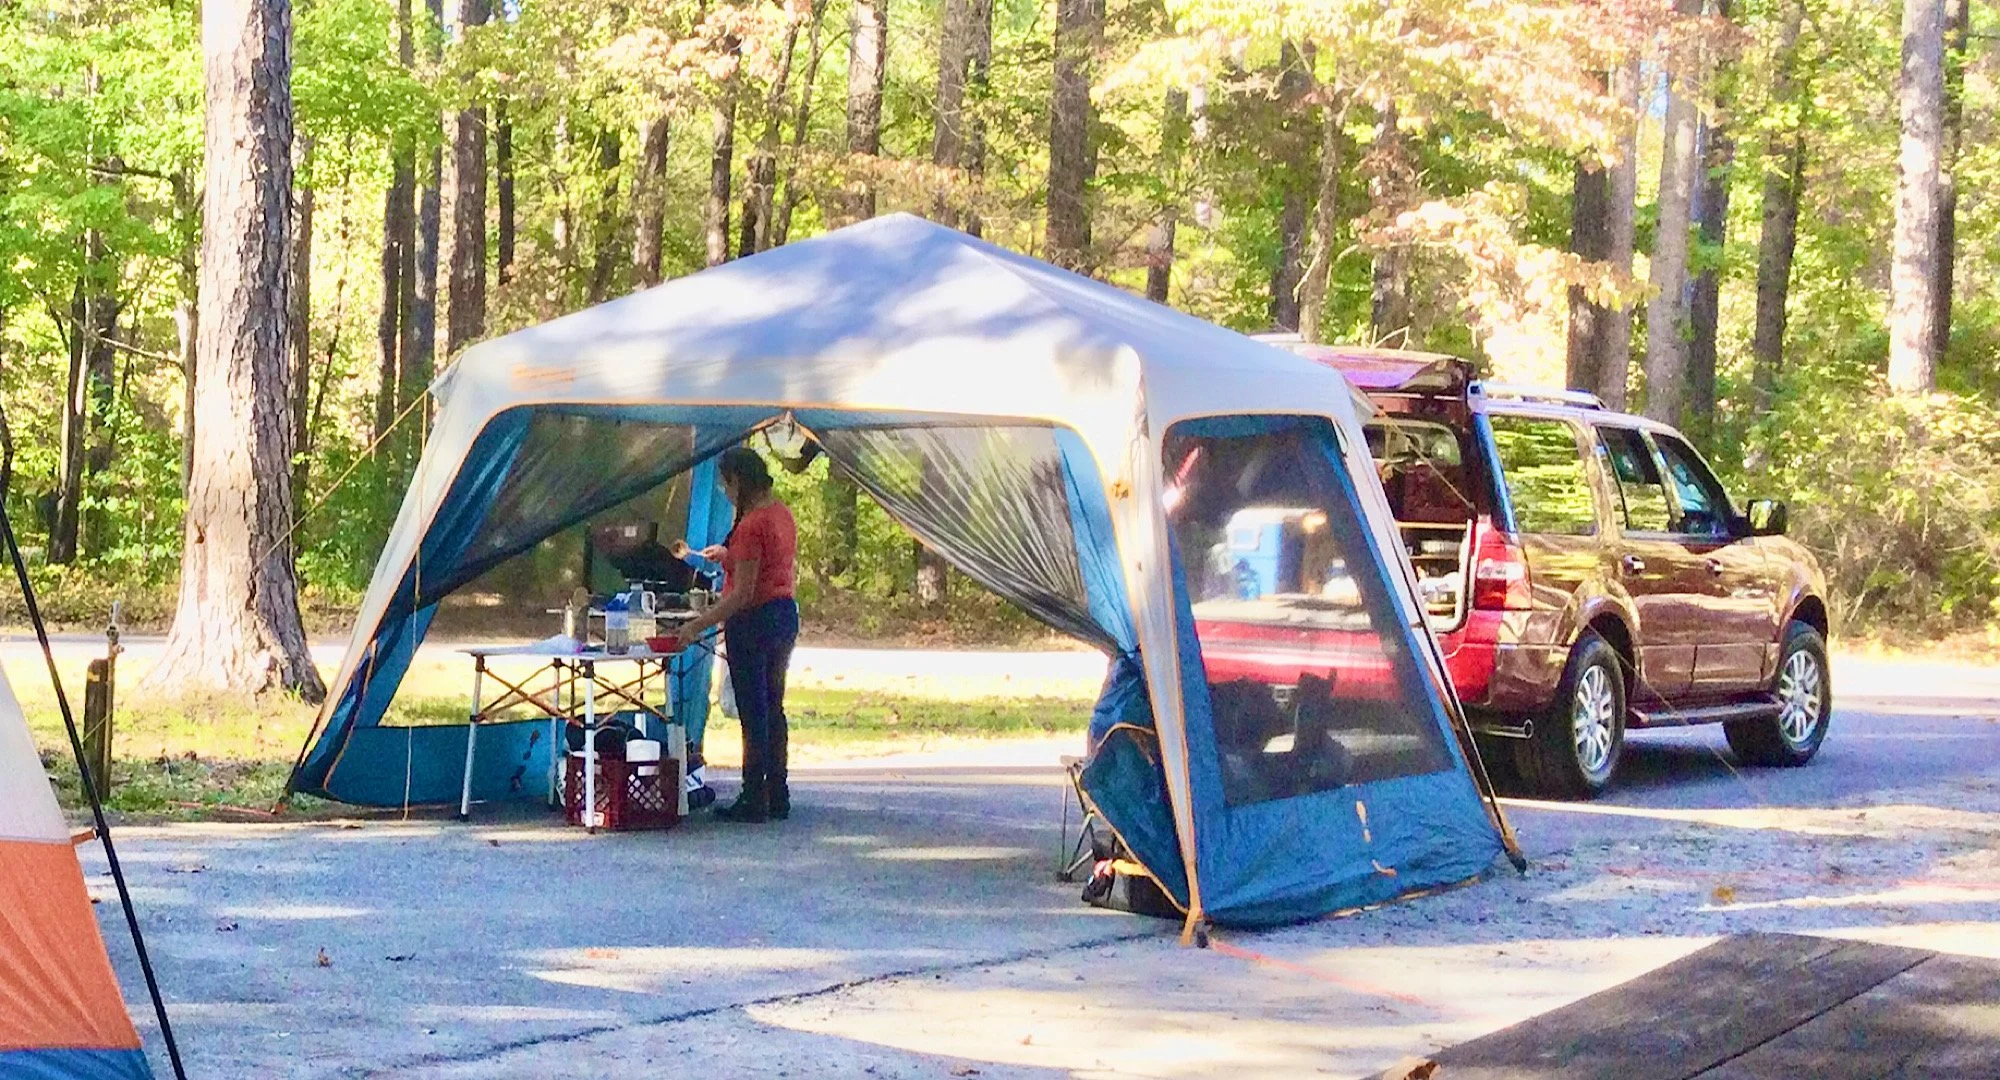
EZ UP-TYPE Canopies: BEST OVERALL
These shelters are economically priced, easy to set up, have vertical walls that create lots of inside standing space, are waterproof, and are cooler in hot weather. But they don’t provide as much mosquito and bug protection. Furthermore, they are very heavy and require considerable packing space.
ABCCannopy Outdoor Gazebo, $370
10’ x 10’ (100 sq ft), 80 pounds. My Top Pick but very expensive, very heavy, and requires considerable packing space.
ABCCanopy with side walls, $260 with walls
10 x 10 (100 sq ft), 67 pounds.
Eurmax Popup Shelter, $265 with walls
10’ x 10’ (100 sq ft), 61 pounds.
Quictent Privacy, $170 with walls
10’ x 10’ (100 sq ft), 40 pounds.
HUBBED SIDE WALL Screen Tents
These shelters are best in cool weather and when campsite has lots of mosquitoes or bugs. They are very easy to set up, have vertical sidewalls, and provide lots of inside standing space. But, sidewalls cost extra, they are very hot in warm weather, they are heavy, and they require extra packing space. Some are not waterproof.
Gazelle G6 Screen Tent, $215 + $120 for walls
10.3’ diameter (92 sq ft), 32 pounds, waterproof.
Clam Escape Quick Set Shelter, $310 + $100 for walls
11.5’ diameter (94 sq ft), 32 pounds.
UMBRELLA-STYLE SCREEN TENTS
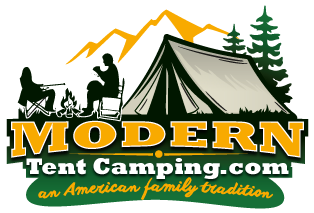
These shelters are better choices when you travel in a small car. They require less packing space, are lightweight, and easy to fit in small campsites. Sometimes, their netting can be removed in hot weather or deployed to protect from bug. And they are waterproof. But, they have sloped sidewalls that reduce inside standing space.
Eureka Northern Breeze, $680 with walls
12’ x 12’ (144 sq ft), 31 pounds.
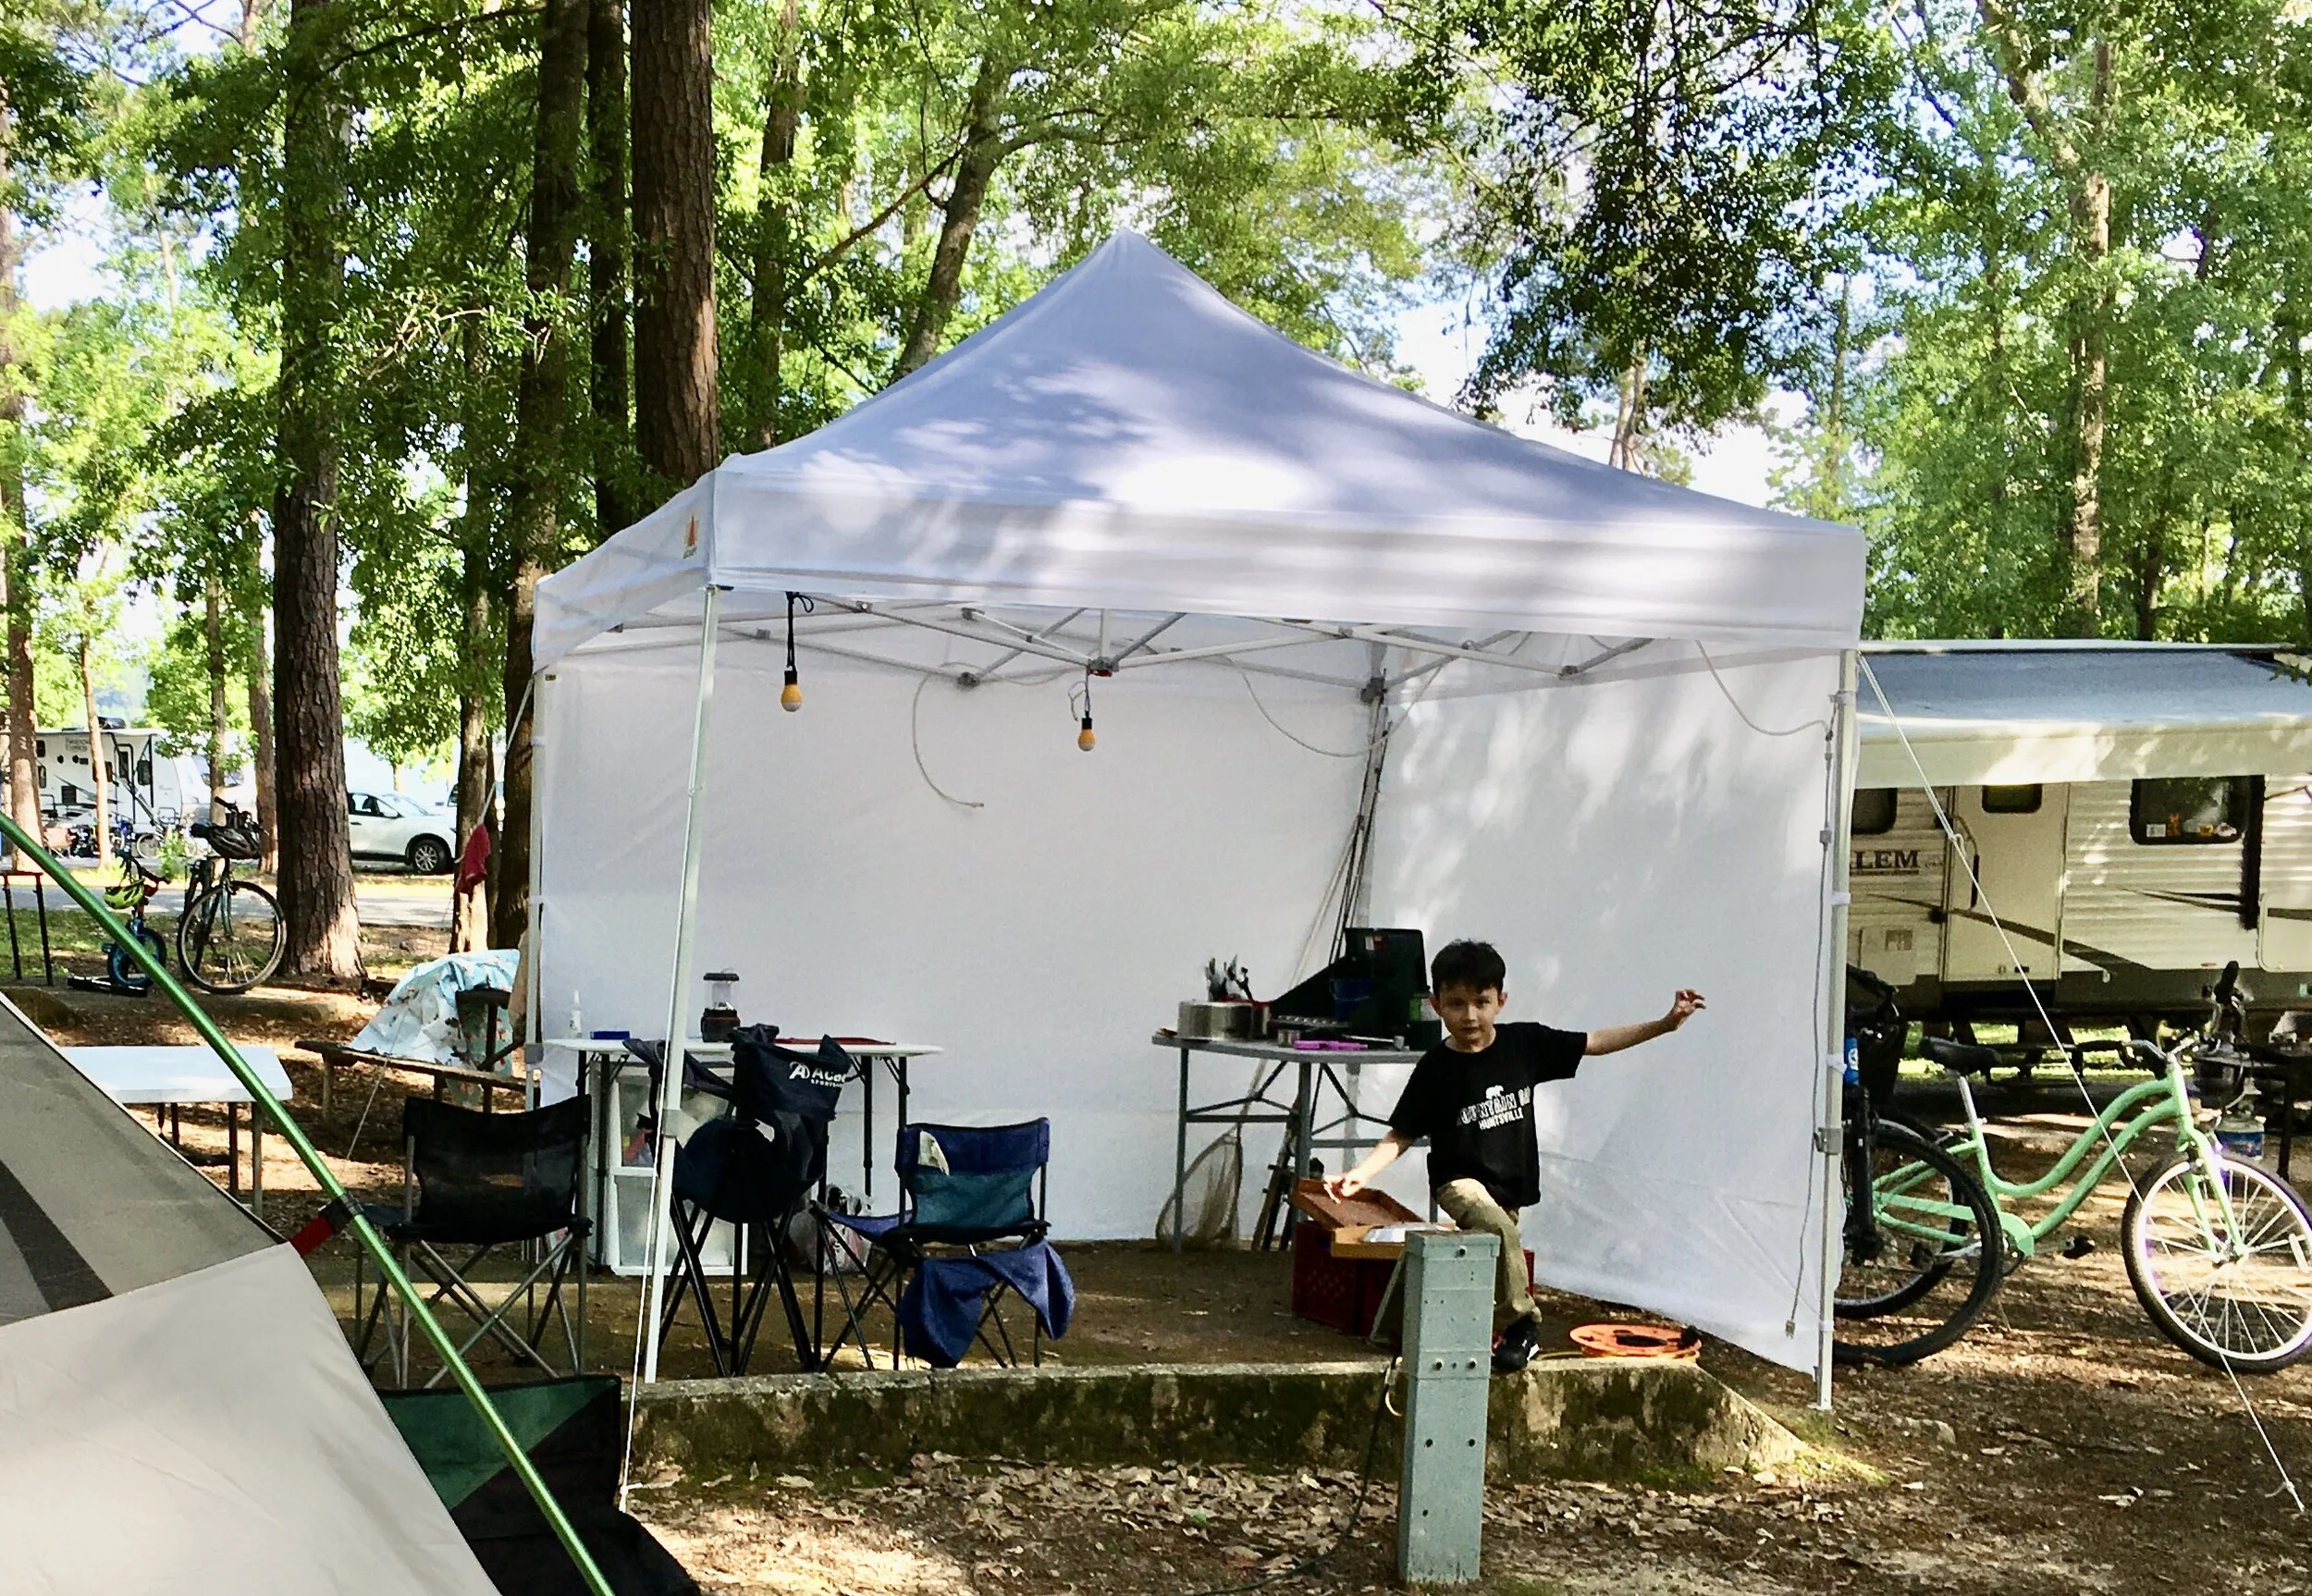
Eureka No Bug Zone 3 in 1, $330 + $105 for walls
12’ x 9’ (108 sq ft), 19 pounds.
CORE Equipment Instant Screenhouse, $150 + walls
12’ x 10’ (120 sq ft), 27 pounds.
Coleman Instant Screen House, $165 + walls
15’ x 113’ (195 sq ft), 18 pounds. Also available 10’ x 10’.
Browning Basecamp, $190 + walls
10’ x 12’ (120 sq ft), 18 pounds.
DOME-STYLE SCREEN TENTS
These are the most compact and lightweight kitchen shelters that are suitable for families that travel in small cars. But they have sloped sidewalls that greatly reduce inside standing space.
Big Agnes Sugarloaf, $400
10’ x 10’ (100 sq ft), 15 pounds, near vertical sidewalls.
Nemo Victory, $450
10’ x 10’ (100 sq ft), 15 pounds, near vertical sidewalls.
REI CO OP Screen House, $300 + 100 for walls
10’ x 10’ (100 sq ft), 13 pounds, near vertical sidewalls.
Big Agnes Three Forks Shelter, $165 + $75 for walls
10’ x10’ (100 sq ft), 7 pounds.
The ABCCanopy EZ Up- style shelter is very spacious but requires considerable packing space.
The Eureka No Bug Zone 3 in 1 umbrella-style shelter has several desirable features but must be guyed out for stability.

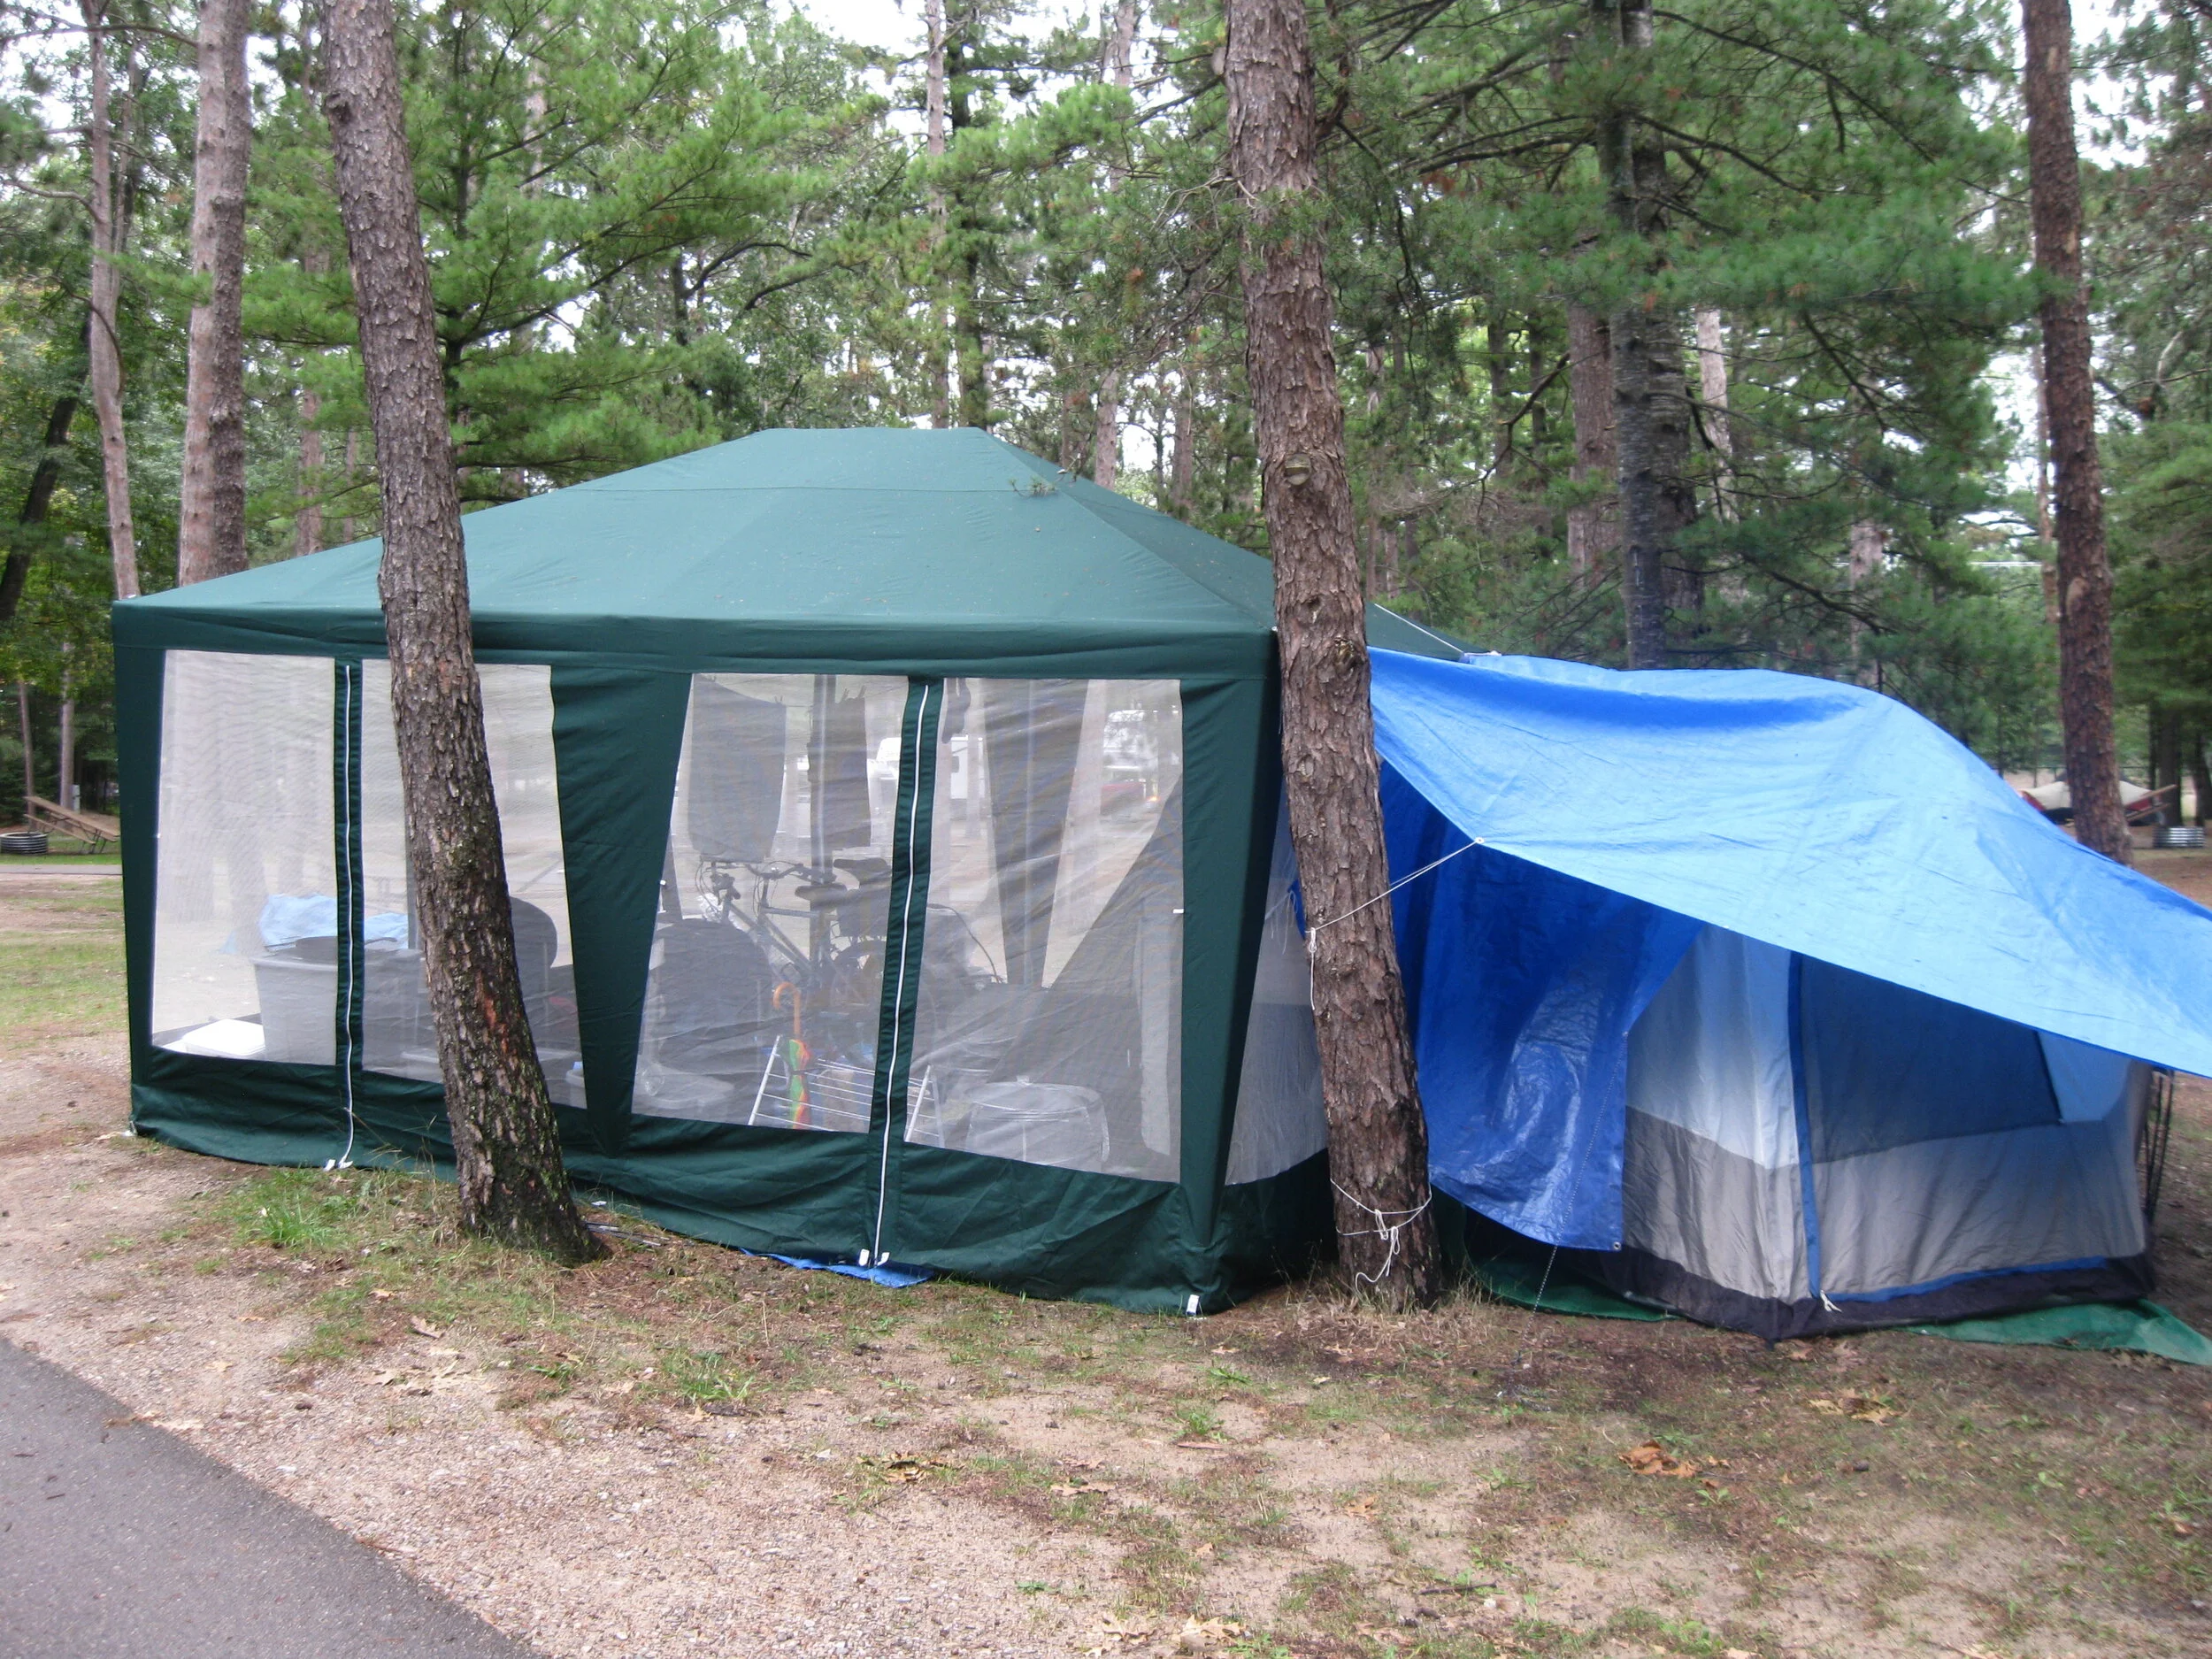
The Flexion Gazebo hubbed wall pull-out shelter is easy to set up but requires considerable packing space.
The NEMO Victory dome-style shelter requires very little packing space.
Tips for buying a good family camping kitchen shelter
Here is a list of important features to consider before buying a shelter.
QUALITY WORKMANSHIP. Buy a shelter made by a well-known maker with durable materials and a good warranty. Good quality shelters will be made with more rugged and durable materials that will hold up to simple set-up mistakes, frequent set-ups, frequent break-downs, and strong winds. Furthermore, most good-quality shelters are backed by a good service department and warranty. Cheap shelters, on the other hand, are usually made with poor-quality materials that can be easily damaged and a poor service department.
VERTICAL SIDE WALLS AND LARGE ROOF provide more inside standing space than shelters with small roofs and sloped side walls. Furthermore, shelters with large roofs and vertical side walls are safer to cook in and provide better rain protection.
WATERPROOF (NOT WATER RESISTANT) ROOF. Some shelters are not waterproof. Instead, they are only water resistant and will leak in heavy rain. Spraying the roof with silicone spray may help, but requires a lot of work, has to be frequently repeated, and still may not make the roof completely waterproof.
AT LEAST 100 SQUARE FEET OF FLOOR SPACE to prepare foods, cook meals, eat meals, wash dishes, and perform other routine camp chores. Larger shelters will not fit in small or sloped campsites along with a large sleeping tent.
SQUARE OR RECTANGULAR FLOOR fits into small campsites better than round, hexagonal, or pentagonal shelters with the same approximate floor space. For example a 100 sq. ft. square floor would measure 10 feet by 10 feet while a 100 square foot round (or hexagonal) shelter would be 11.3 feet in diameter.
AT LEAST 7-FOOT HIGH CEILING. Many shelter roofs are so low that tall people have to stoop over to enter them and walk around inside.
E-Z SETUP. Most shelters can be easily set up by two people but can be difficult to set up if you camp alone. So, look for a shelter that you can easily set up by yourself.
WATERPROOF SIDE WALLS. Many shelters are sold without side walls - but always buy or add sidewalls for it. Side walls provide protection from wind, rain, and cold weather. In my opinion, constant wind is the single weather condition that makes many camping trips unpleasant. Moderate breezes can easily chill your body after a little exertion and can be unbearable when you just want to relax. And, they make cooking more difficult. If you can’t find sidewalls for your shelter, make them with fabric shower curtains.
SCREEN SIDE WALLS. These walls can keep bugs out, but most of the year they are not needed, and when they are needed in warm summer weather, they can make the shelter so hot, you can’t stand to stay inside. For example, flies can frequently make a summer mid-day meal unpleasant but you can’t eat your meal inside a screen tent because it would be too hot. On hot days, shelters with removable walls and doors would be more comfortable and citronella candles could be used to reduce flies.
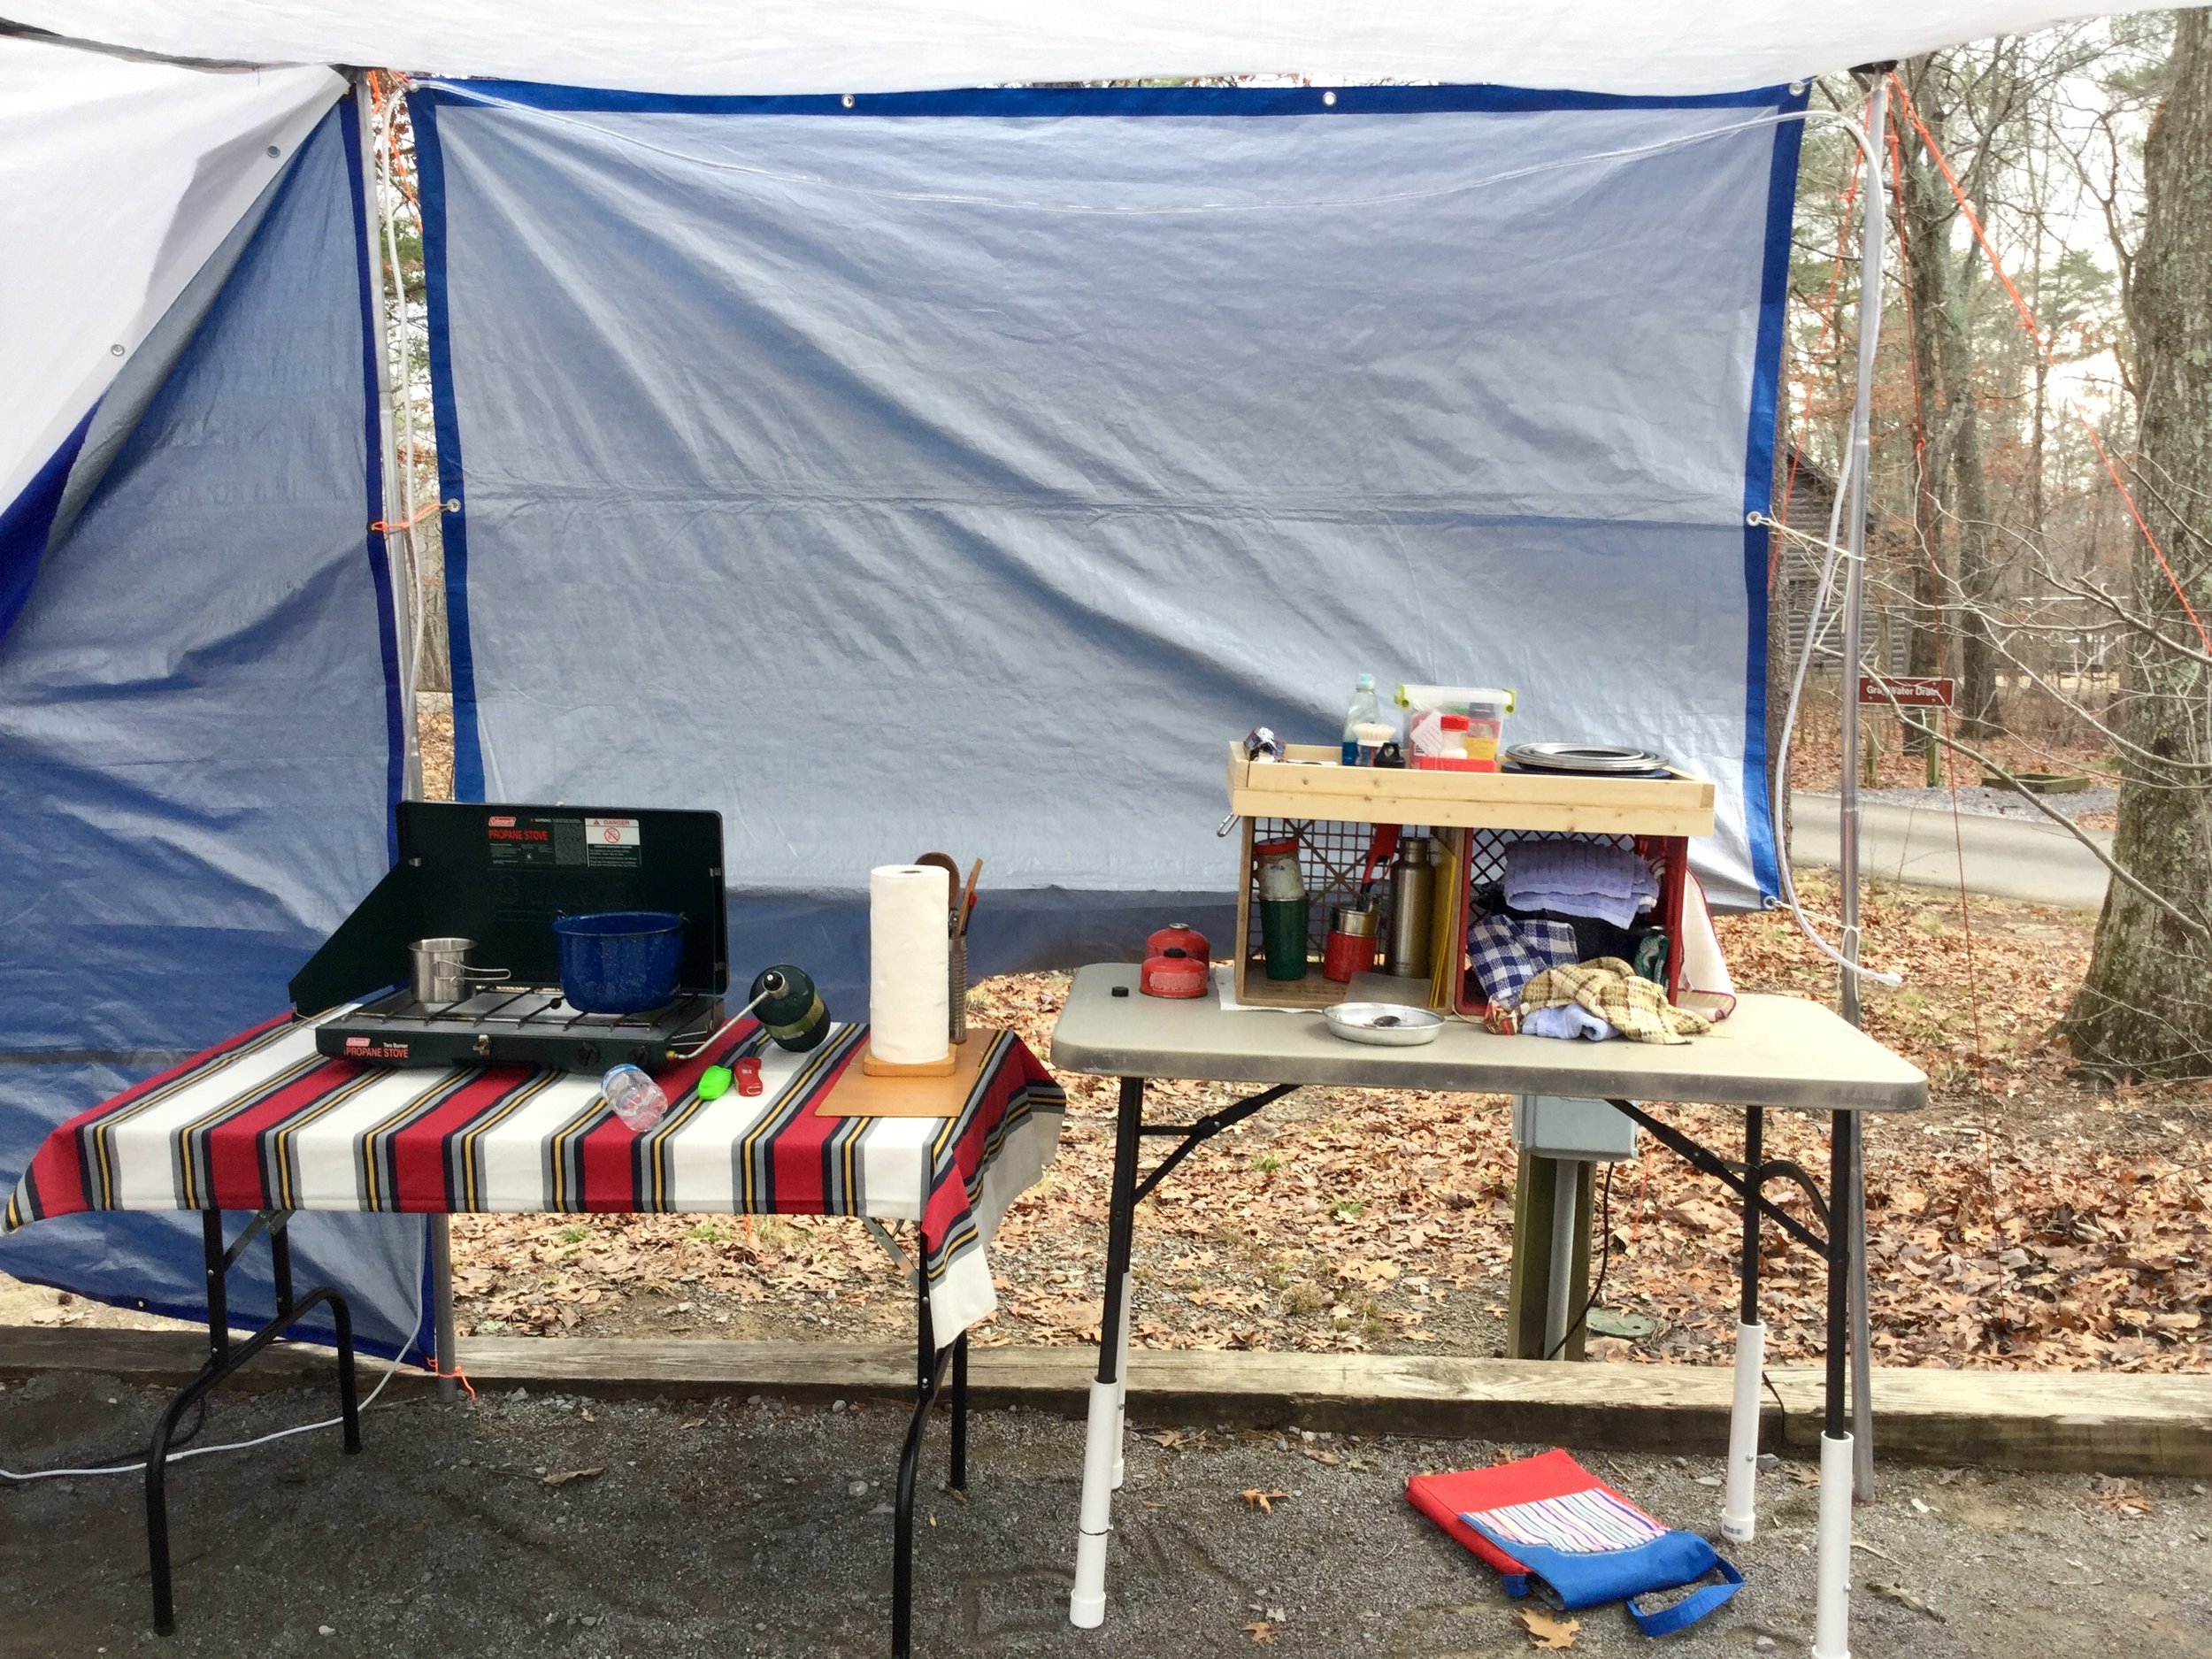
Plastic sidewalls create a cozy cool-weather respite.

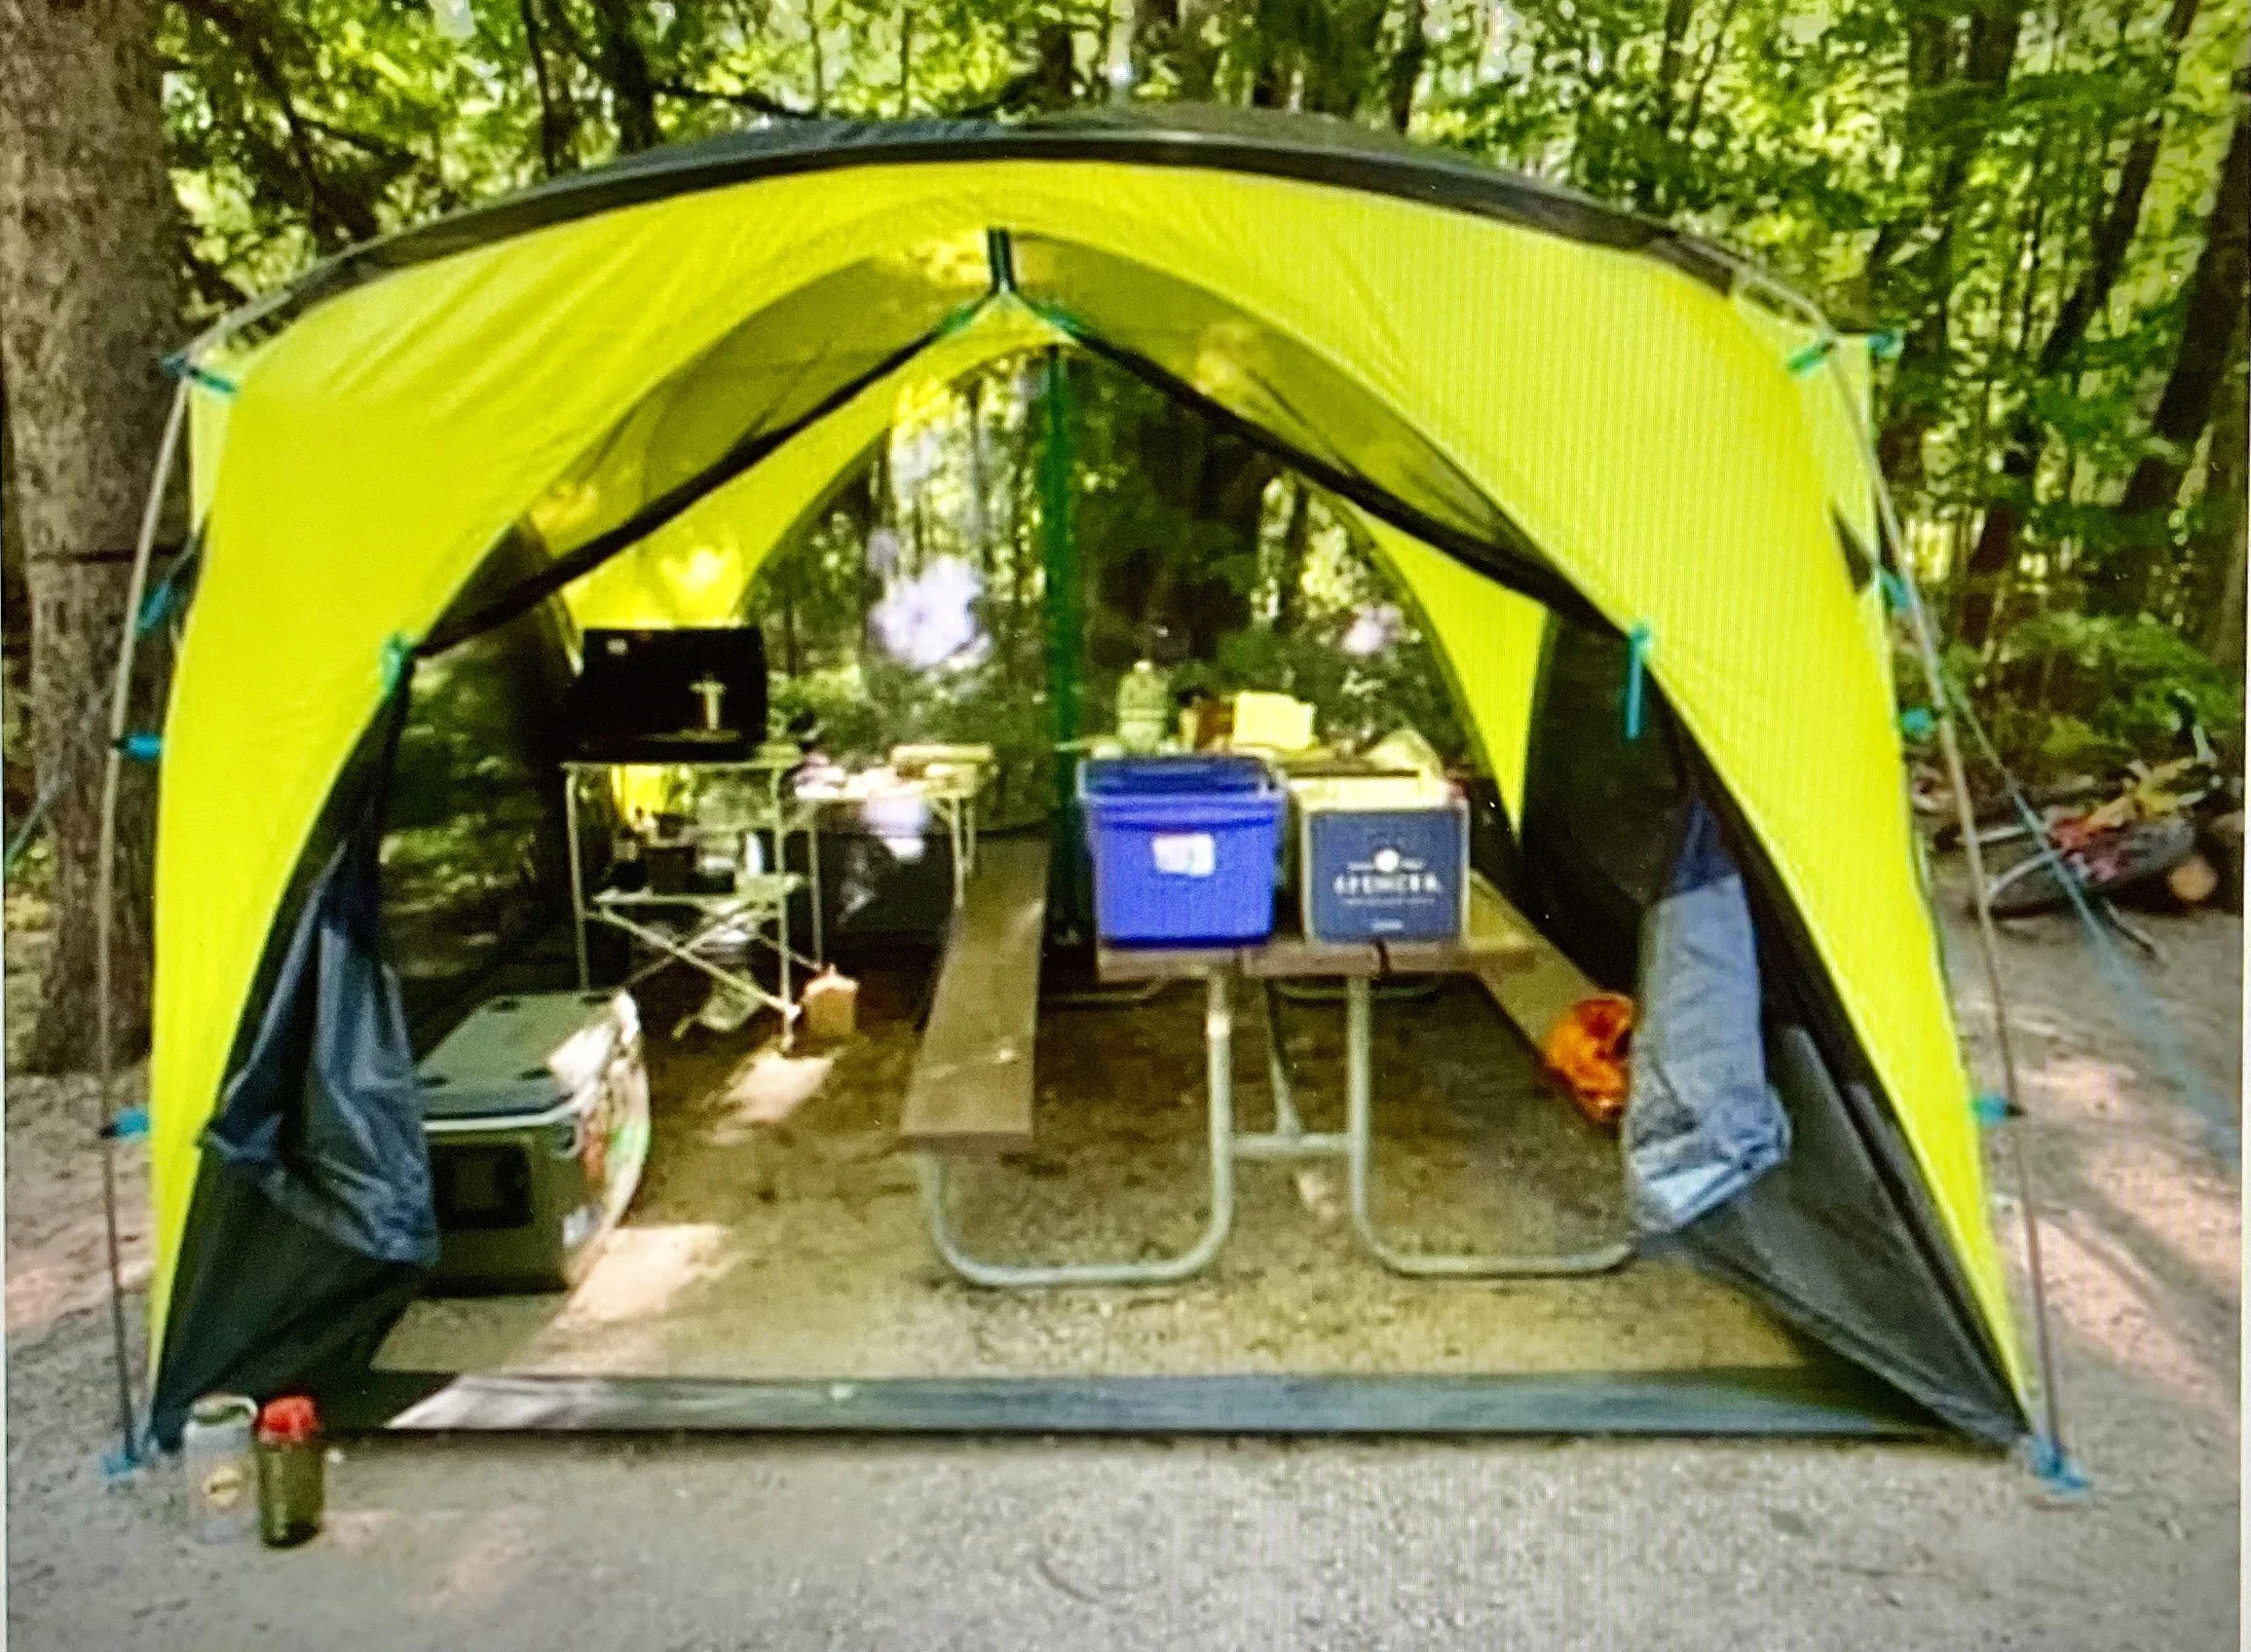
The Big Agnes Three Forks dome shelter is very lightweight and requires little packing space.

You can make a comfortable kitchen shelter with four tarps but it takes time to set up and has several guy lines that could trip you.
Use tarps or fabric shower curtains to make side walls.
Things to add
After buying a kitchen shelter, you should add several things to make it more comfortable in a wider range of weather conditions.
GOOD-QUALITY GROUND STAKES. Stakes that typically come with shelters will easily bend in rocky soil or tent pads. So buy good-quality stakes and always stake your shelter down and guy it out to prevent wind damage.
SMALL FOLDING WORK TABLES AND CHAIRS. Place them around the sides of the shelter. Although many campers move a picnic table to the middle of their shelter, this is a poor practice because the large awkwardly shaped table and benches will block most of the shelter’s working area and make it difficult to prepare meals, wash dishes, and perform other routine camping chores. Sometimes, the table is so large that it sticks out the front door.
BATTERY POWERED LAMPS. Add lights to your shelter so you can use it after dark. You’ll need fewer lights in the summer when the sun sets late in the evening - but will need more light in early spring and late fall when the sun may set about 5 or 6 P.M.
INSECT REPELLANT. Screen walls cannot keep all mosquitoes out. So buy repellant and candles.
FAN to move hot air out of the shelter and keep insects away.
SPACE HEATER, such as Mr. Heater or electric space heater, in cold weather to make your shelter a warm and cosy respite from wind and cool temperatures.
Economical Tarp Shelter
If you can’t afford to buy a screen tent, you can make a good kitchen shelter from tarps for about $50. You’ll need four 8 by 10-foot tarps. One tarp will serve as the roof, one as a lean-to back wall, one as a side wall, and one will be cut diagonally to make triangular sides for the lean-to back wall. In cold weather, you may want to add 2 more tarps to completely enclose the shelter. In addition, you’ll need three 8-foot poles, one 6-foot pole, 100 feet of 3mm utility cord, and ten 10-inch nail stakes. The poles could be the most expensive item but you can use closet rods, sheet rock poles, electrical conduit, or small saplings cut from private property.
This home-made tarp shelter is inexpensive, roomy, and very comfortable - and would make a great kitchen shelter in large campsites with a grass or dirt surface. But, it has three limitations that should be considered before packing for a trip.
1. It is non-free-standing so that if one guy line is broken or stake pulls out, it can begin to collapse.
2. It requires at least 10 stakes to stand and these stakes can be hard to drive into hard-packed gravel surface.
3. It requires 8 guy lines that can pose tripping hazards, especially in small campsites.
Once a kitchen shelter has been set up, set up tables to provide working and eating space, hang lights from the poles for night time use, and set-up a ThermaCell tower or citronella candle to ward off mosquitoes. In hot weather, set up a fan - and, in cool weather, set up a small space heater. In cold weather, you could add a front wall, build a campfire just beyond the open side wall, and then hang a silver space blanket reflector behind the campfire to reflect heat into the shelter - just like early campers set up old Baker tents. Baker tents with campfires and reflector screens were used for many years in northeast wilderness areas to heat open front shelters on cold and frosty nights.